Overview Page
The AI TENDERINGMANAGER overview page consists of two registers (3) and several different areas, which are briefly described below.

The left-hand area, Tasks (1) in the Current tab contains all the tasks you are supposed to perform. The icons next to each task indicate whether it is a form entry or whether a function is being accessed. The most important task icons are summarized in the following table.
| Task icon | Meaning |
|---|---|
 |
Accessing a form for data entry |
 |
Open and edit the service specifications or order items in a price inquiry. |
 |
Open and edit the Deadline and Period Manager. |
 |
Access and edit the questionnaire for the selection criteria or the dialog for selecting participants. |
 |
Access the publication dialog or the dialog for sending messages. |
 |
Call up the dialog for printing, exporting or creating a revision level. |
 |
Call up the dialog for opening offers. |
 |
Calculative check and subsequent recording of the service specifications. |
 |
Open the matrix for the bid check, price comparison, evaluation, award proposal and awarding. |
 |
Open the dialog for compiling the tender documents. |
 |
Locked task, e.g. when the award procedure is canceled. |
You can use the Search/Sort link (2) at the top right of the Tasks area to control the sorting criterion for the task display.
On the right-hand side in the two smaller areas of the Current tab, you can see all the appointments (5) and messages (6) from the platform. Similar to a website, each table row is displayed as a link (hand symbol) and is highlighted in gray when you point to it with the mouse. A mouse click is all it takes to call up the detailed view of the corresponding award procedure.
Info
In the news area (6), you can use the filter link to determine which type of news is displayed to you, in order to distinguish direct work orders from pure information messages.
To do this, click on the link Filter The Filter messages window opens. You can enter a search term in the upper input field and click on the magnifying glass symbol to the right of it to restrict the list of messages to a specific award procedure. The list field below contains all the labels of the messages currently available. Make your selection here to see only certain messages. You can also combine the entries in the two fields.

The second tab of the overview page, Awards (3), lists all active awards of the logged-in user. Change the sorting of the table by clicking on the desired column title.

Finding a specific award procedure – even with large amounts of data – is made easier in both registers by using a filter. Enter a search term in the search field (4) and click on the magnifying glass icon to the right of the input field. In both registers, only entries that match the search term are displayed. The Appointments (5) and Messages (6) areas are also filtered. Remove the search term by clicking the button with the black X if you want to switch off the filter.
The status bar (9) at the bottom of the overview page of the AI TENDERINGMANAGER window contains the following information of an open award procedure (from left to right): - The award procedure number - The current award phase - The type of procedure - The server and user names
Project Tree and Navigation
With the help of the Sidebar
 from the toolbar (7) to switch the project tree and navigation bar on and off in the left window area.
The sidebar can be easily hidden and shown again using one of the following options: - The Show sidebar icon in the toolbar (7) - The EXTRAS - SHOW SIDEBAR menu item in the menu bar (8) - The [F11] key
The project tree contains a structured overview of all forms for the currently open award procedure and the current project. You can expand or reduce the displayed list by clicking on the + and - signs in front of the folder symbols.


Info
If you have the appropriate rights, you can choose between the project tree and the navigation when opening the sidebar.
The award procedure with all its different phases and the corresponding steps is displayed in the navigation. A navigation step consists of at least one workflow step, but in most cases of several. Click on the white or black triangles to show or hide the list of workflow steps.
Completed workflow steps are marked with a checkmark and green font color in the navigation, while workflow steps that have not yet been carried out are gray. The current workflow step has a black dot or, if it is currently being executed, a black arrow.
Info
This navigation bar is only available if you have the appropriate rights and the customer model of your AI TENDERINGMANAGER has been customized accordingly.
Creating Folders for the Award Procedure
Additional folders can be created in the project tree for storing files in the award procedure. Right-clicking on the desired node in the project tree opens the menu with the option to create a new folder. After the folder has been created, right-clicking on the folder opens the dialog for importing files. Uploaded files are ultimately part of the revision status and thus the tender file. Folders can also be renamed and removed by right-clicking. All files in the selected folder at that point in time will also be removed.

Folders created in this way can be structured with subfolders as required. The structure created in this way is mapped accordingly in the award file.
Detailed View of an Award Procedure
To access the detailed view of an award procedure, click on the corresponding line in the table (3) of the Award Procedures tab or in the task area (1) of the Current tab on the overview page.
The active workflow step is called up and displayed as a tab. In some cases, another tab is added during the processing of the task. You can switch back and forth between the tabs by clicking the corresponding tab. All tabs have a close button on the right side. The tab of the active tab has a darker font.

You can return to the overview page by clicking on the first tab from the left Show home and then on Show overview page

In most cases, you will have to confirm a few warning messages to save changes. It is possible to combine several forms and editing activities into a task package. An overview page explains the task package and contains links to open the individual tasks. Data entry is synchronized between the individual forms.

User Settings
In the upper part of the application area, you can customize the user settings for the display of the start page. To do this, click on the link Customize this page. The User Settings window opens.
Frequently asked question
If you are in the detailed view of an award procedure, the text Display overview page appears instead of the Customize this page link. This takes you back to the overview page of the AI TENDERINGMANAGER.
The left side of the "User settings" window contains six entries that you can select. The settings options for each entry are displayed on the right.
Home Page

Select the Show simplified home page check box if you want to hide the tasks, messages and appointments areas in the overview page.
System Settings

Click the button with the paperclip symbol to change the current user directory or the default directory for importing files.
Tip
In the E-mail notifications list box, you can determine the type of messages that are displayed. The default setting is ALL notifications. For example, if you only want to see the technical notifications instead of the workflow notifications, select the Only Notifications For Assignment Events entry from the list.
Activate the Enable spell check check box if you want to enable an interactive spell check. As in MS Office programs, unknown words will then be underlined with a red wavy line. Right-click on the word and select a suggestion, if available - select a suggestion from the top part of the context menu or use Add the text to your user dictionary or remove the red marking by selecting the Ignore All command. In the Inbox section, you can activate the Automatically start activities check box so that workflow steps that you complete by clicking the Next button are automatically started when they reappear in your inbox. By checking the last two boxes in this section, you ensure that you are notified when new messages or activities arrive. The checkbox in the Actions section Actions section section section section section section section section</span In the User Interface section, you can show the toolbar and the status bar by activating the checkboxes. In the Help section, you can activate the explanation texts that are displayed below the input field for most input fields in forms and function dialogs.

Info
If this option is not activated, the same explanatory texts are displayed as a tooltip when you point to the field label with the mouse.

Award Overview

Click on the Display mode drop-down menu and specify whether you want to see all award procedures or only a specific selection in the table area of the overview page. In the lower part of the window, in the fields Table columns and Order, you can set the type and number of table columns on the overview page. Clicking on an entry in the Table columns field copies it to the Order field on the right. Here you can change the order of the columns using the arrow keys above or below. To remove an entry from the right field by clicking on the single left arrow. Clicking on the double arrow deletes the entire content in the order field.
Appointments

At this point, you can use the list boxes Displayed appointments and Display period to define the type and period of the displayed appointments.
User Settings – Registration
Here you can make user-specific settings, e.g. prohibit registration with username and password. In this case, only registration with a signature card (SMARTCARD) is allowed.

A user with these settings will receive a corresponding message when trying to log in with username and password.

Info
This setting only takes effect if you have registered the signature card beforehand using the EXTRAS - REGISTER SIGNATURE CARD command.
User Settings - Validation of GAEB Files
Warning
You can use GAEB integration to validate GAEB files in AI TENDERINGMANAGER. This enables you to make the third-party application wingaebxml (from version 4.0.0.35) from the company Schnittstelle BAU known to your AI TENDERINGMANAGER and thus have GAEB files automatically validated when uploading them to the AI TENDERINGMANAGER. The application is available free of charge at www.wingaeb.de/download.

In the Validation of GAEB files section of the User Settings, none of the radio buttons are initially selected. The first time you try to import a GAEB file into an award procedure, a message to this effect is displayed.

Select the option Validate GAEB file with wingaeb XML and use the paperclip icon to add the path to your local **wingaeb**xml application.
Every time you import a GAEB file in a form or in the workflow step Create service specifications (as external service specifications), it is automatically validated by wingaeb xml and the result is displayed in another window.

Info
The validation result has no effect on the further course of the procedure. It only serves as information for the awarding authority, which wants to ensure that valid GAEB files are available on the bidders' side for the preparation of offers.
Info
For the validation, only the GAEB formats GAEB 90 ( *.d83/ *.d84 ) and GAEB XML ( *.x83/ *.x84 ) are supported.
Tip
You can also import the GAEB 2000 file format ( *.p83/ *.p84) if you switch the file type to All files (*.*) in the Open File window.

In this case, you will see a note that the GAEB 2000 file type is not supported. The award procedure can still be published.
Warning
Please note that in this case, bidders cannot use the **wingaeb**xml program provided in the **AI BIDDERS**COCKPIT to view and fill out the GAEB files. This means that you will need a different program to edit the GAEB files.
Click Save or OK to apply your changes to the user settings or Cancel to discard the changes.
Toolbar
The most important functions can be conveniently accessed via the toolbar (8) of AI AWARD PROCEDURE MANAGER. If you point to a symbol with the mouse without clicking, the name of the symbol appears as a tool tip in a blue text field below the mouse pointer.
The following is an overview of the most important symbols and their meaning:
| Symbol | Meaning |
|---|---|
 |
New – Open the drop-down menu to create: project, subproject, announcement, award procedure, award procedure based on template, supplement, qualification system, award procedure in qualification system, dynamic purchasing system, individual order for dynamic purchasing system, order, price request, public price request, direct purchase, direct order, service specifications. A new project is created by default together with a new award procedure. |
 |
Open – Open the drop-down menu to open: projects, award procedures, notices, orders, service specifications. By activating or deactivating the checkboxes, you can customize the display in these windows to suit your needs. |
 |
Refresh – Update task inbox and process overview – The task inbox is updated, newly assigned tasks for the user are displayed, completed tasks are removed. Alternative: the [F5] key. |
 |
Sidebar – Show project tree or Show navigation – Switch the project tree and the navigation bar on the left side of the window on or off. Further information can be found in the chapter project tree and navigation. Alternative: the [F11] key. |
 |
Print – Sends the open form directly to the connected printer. Only active in forms. |
 |
Preview – Opens the PDF form for viewing. Only active in forms. |
 |
Export – Save the data of the current form in PDF format. Only active in forms. |
 |
Revert – You can re-edit the workflow steps that are assigned to you and have not yet been completed (see also chapter Reverts in the procurement process "Returns in the procurement process"). Clicking on the button opens a list of possible starting points for the return. If you point to one of these entries without clicking, a list of possible target points for the return will appear to the right. If the current activity is in progress, it is listed first and separated from the other activities by a line. The dividing line is omitted if no task is in progress. |
 |
Workflow – Opens a graphical overview of the award procedure. |
 |
Funktionen – Display function assignment: Overview of responsibilities within the award procedure. |
 |
Dates – Dates of the current award procedure. |
 |
Messages – Display message overview: Overview of all messages sent or received within the award procedure. |
 |
Revisionsstand – Saves the current status of all award forms as a revision copy. |
 |
Leistungsverzeichnisse – Used to create a service specification, independently of an award procedure or workflow. For more information, see the chapter Administration of Service Specifications . |
 |
Help – Opens the online help. |
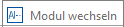 |
Switch Module – Changes the program perspective, e.g. to the AI COMPANY MANAGER, if this is configured in the customer model. |
Menu Bar
All functions of the AI TENDERINGMANAGER are thematically structured in the menu bar (9) of the program.
Info
You can also access almost all menu commands using keyboard shortcuts. Press the [ALT] key and the underlined letter from the menu name at the same time (e.g. [ALT] + [D] for the FILE menu). A black arrow to the right of a submenu entry indicates that another submenu can be accessed.
The following is an overview of the menu commands and their meanings. The underlined letters correspond to the set shortcut keys.
Menu Item - File
| Menu Item | Meaning |
|---|---|
| NEW | Create a new project, sub-project, [dynamic purchasing system] (../verfahrensvorlagen/dynamisch. md "Switch to dynamic procurement system"), direct purchase, service specifications or to a contract award procedure, to a supplementary contract award procedure, to a price inquiry, to a contract award procedure/prior information notice, or Generate an award procedure based on an already created award procedure. |
| OPEN | Opening the selection window for existing projects, award procedures, announcements, orders, service specifications. By activating or deactivating the check boxes, you can customize the display in these windows to suit your needs. |
| IMPORT | Importing an external service specification. |
| EXPORT | Export of the current and awarded service specifications as an export file with different formats or of the currently open form as a PDF file. |
| Printing the form in the currently open workflow step, e.g. the bill of services. | |
| PAGE VIEW | Exporting the bill of services as a PDF file. |
| EXIT | Exiting the program. |
Menu Item - Participants
| Menu Item | Meaning |
|---|---|
| RECORD PARTICIPANT | Manual entry of a new candidate. Activated only after publication. |
| PARTICIPANT OVERVIEW | Calling up the list of participants with information on the tender and award documents. |
| COMPANY MASTER DATA | Calling up the overview company master data. |
| ADDRESS OVERVIEW | Opens the selection list of internal administrative address data. This data is available to all users of AI TENDERINGMANAGER. |
| NEW ADDRESS | Opens the New Address window for entering new address data for the internal administrative overview. |
| CAPTURE PARTICIPANT REQUEST | Used for the complete documentation of all contacts with the participants. |
| SEND MESSAGE TO PARTICIPANTS | Sending an e-mail message to all or individual participants. This is only activated after an electronic publication of the award procedure or the competition for participation. |
| MESSAGE OVERVIEW | Opens the Messages: Overview window for all messages exchanged with the participants in an award procedure. |
Menu Command - Assessment
| Menu command | Meaning |
|---|---|
| DATES OF CURRENT AWARD PROCEDURE | This menu item allows you quick access to all dates relevant to public procurement law for the current call for tenders. |
| ALL DATES | This menu item allows you quick access to all dates relevant to public procurement law for the various calls for tenders that fall within your scope of application. Dates can also be selected according to other criteria. |
| REPORT MANAGER | Read out of evaluations related to the current award procedure. The content is based on the customer's requirements. |
Menu Option - EXTRAS
| Menu Option | Meaning |
|---|---|
| NOTE EVENT | Events during an award procedure are recorded and documented. |
| WORKFLOW RETURN | Call up the dialog for selecting the start and end points for the [return jump] (../verwaltung/formular.md#returns-in-the-award-procedure "Switch to returns in the award process") within the workflow steps of an award procedure. |
| PROCESS OVERVIEW | Graphical representation of the workflow with the option to view details of the individual workflow steps. |
| UPDATING THE TASK INBOX AND PROCESS OVERVIEW | Updating of all windows, e.g. the task inbox. Alternative: the [F5] key. |
| EDIT FUNCTION ASSIGNMENT | Overview of all functions within an award procedure and the employees responsible for them. If requested by the customer, it can be ensured that a function is not assigned to unauthorized users or that the same users are not assigned who are already assigned to another function. |
| FORM AUTHORIZATIONS | Definition of access authorizations to forms for individual users or user groups (items or functions). |
| GRANT READ ACCESS TO FORMS OF CURRENT AWARD PROCEDURE | Certain users can, if necessary, be granted read access to all forms, the service specifications and the revision status of an award procedure. The execution of this function is logged in the award notice (area: NOTE ON EVENTS). |
| CLEAR LOCAL INTERMEDIATE STORAGE | Clear the local intermediate storage. The required resources are reloaded from the server the next time they are accessed, e.g. after a form set update. |
| SAVE REVISION STATUS | Calls up the forms relevant to the award procedure with the option to print, export or save a revision status with a time stamp for documentation purposes. |
| ARCHIVING AWARD PROCEDURES | Calls up the dialog for archiving completed award procedures. |
| SET REPLACEMENT FOR OTHER USERS | Open the window [Set replacement]. Enables a designated user to change the replacement designation decentralized |
| REPRESENTATIVE ADMINISTRATION | Calls up the window Set representative. Setting and activating a representative role. |
| CHANGE PASSWORD | Calls up the input mask for changing the password. Attention: In a productive system, every user should change the default password! |
| USER SETTINGS | Here you can set the user directory and the type of appointments and information on the start page. |
| SIGNATURE CARD REGISTRATION | Instead of a password, you have the option of registering using a signature card. To do this, you need a card reader and a signature card that is supported by the system. For further details, ask your system administrator. |
| EXTERNAL DOCUMENTS | A module for managing the document server integrated in AI TENDERINGMANAGER. Here you can directly download all documents that are managed via the document server (tender documents, templates). |
| KEY TEST | Open the private key store window. Check the stored key files. |
| KEY PROPERTIES | Display information (tender number, key number, version) of a stored key file. |
| ADMINISTRATION | Menu item with functions for system administration of the AI TENDERINGMANAGER. |
| CHECK CONSISTENCY WITH AWARD PROCEDURE | Establishing a connection to the award platform and checking or transferring all received requests to participate/offers for the current award procedure. |
| BACKGROUND PROCESSES | Opens the Background Processes window. Display and editing of cross-system processes. Please also read E-Awarding: Asynchronous Communication. |
| SYSTEM EVENTS | Open the System Events window. Display and edit cross-system processes. Also read E-Awarding: Asynchronous Communication. |
| SERVICE SPECIFICATIONS | Open the SERVICE SPECIFICATIONS tab for procedure-independent processing of service specifications. |
| SYMBOL BAR | Switch the symbol bar on or off. |
| STATUS BAR | Switch the status bar on or off. |
| SIDEBAR VISIBLE | Switch the NAVIGATION and PROJECT TREE on the left side of the window on or off. |
Menu Item - Auction
This menu item contains commands that are executed or called up again during workflow processing. However, the possibility of executing these actions is aligned with the respective user rights and the current status of the procurement process.
Warning
The menu item Cancel Award leads to the cancellation of the current tender and can only be executed with the appropriate authorization.
When an award procedure is cancelled or revoked using the corresponding action, the user is asked to confirm the action in order to avoid unintentional execution. The message text can be changed individually for each customer.

Info
This function is only available to you if the customer model of your AI TENDERINGMANAGER has been customized accordingly.
Menu Item - Help
| Menu Item | Meaning |
|---|---|
| HELP TOPICS | Open the online help. |
| INFO | Program information and details about the manufacturer. |
| CREATE ERROR REPORT | This allows you to document an error that has occurred, save it locally and send it to software support. |